Today I made Cuban Potato Balls. This is a new recipe for me, and while the prep work was a bit time consuming, the end result was pretty good. In the interest of full disclosure, this recipe needs a lot of tweaking in my opinion. I will give my comments after I post the recipe.
Ingredients:
8-10 medium baking potatoes, peeled and diced
2 tbl. milk
3 eggs
1 cup dry bread crumbs
1/4 cup all-purpose flour
1 pound ground meat of your choice
1 medium green bell pepper, finely minced
1 medium red bell pepper, finely minced
1 medium onion, finely minced
1 tsp. each of the following: Salt, pepper, cumin, paprika, oregano, onion powder, garlic, chili powder
4 tbl Worcestershire sauce
Juice of one lime
Vegetable oil for deep frying
Preparation:
Peel the potatoes and cut into chunks for boiling. Place in large pot, fill pot halfway with water and rinse the starchy white water away. Fill pot with clear water, a pinch of salt, cover, and bring to a boil.


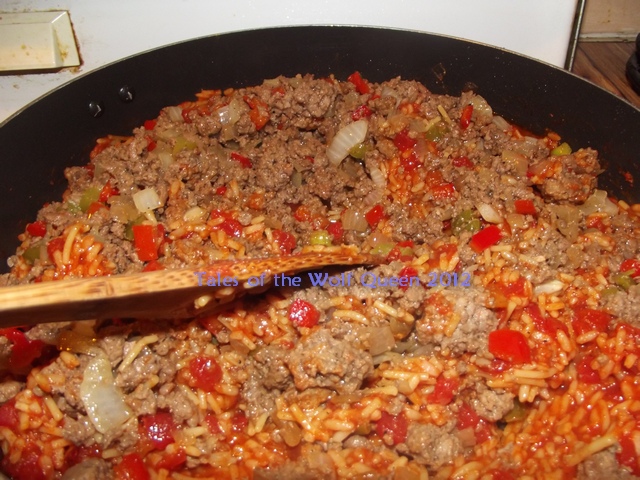
While you are waiting for the potatoes to boil, start browning the ground meat in a large skillet, and finely mince the onion, red and green bell peppers,( yes I am still using the frozen peppers from my huge farmers market haul lol ) and add them to the meat mixture.


Give this a good stir and cook until the meat is browned. Then add your spices and the Worcestershire sauce, along with the lime, stirring until incorporated.


Let this cook for about 5 minutes longer, then turn off the heat. You want the filling to be cool.


Let the filling and potatoes cool to room temp, then stick them in the fridge for about 30 minutes. While you are waiting, line a baking sheet with wax or parchment paper. In a medium bowl, whisk the three eggs. In another medium bowl, add bread crumbs and flour, mixing them well. Set aside with the baking sheet.


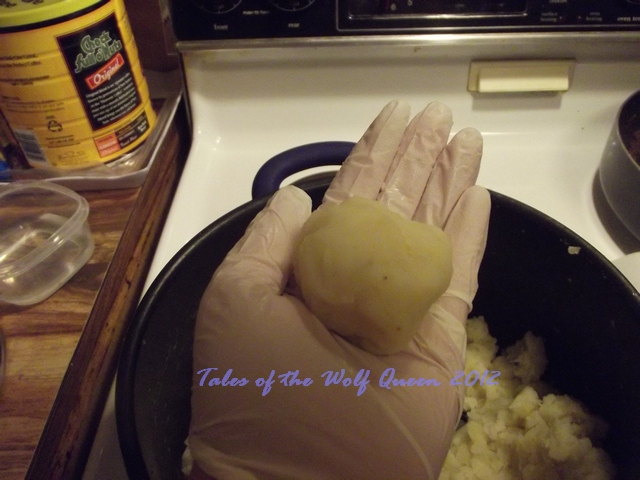
Once the potatoes and filling are cool, we are ready to form our balls. This part was a bit tricky, and I only have a couple of pictures because it is impossible to do most of the steps without both hands, and I did not have anyone to help me take pics this time. Scoop a tablespoon of potato ( an ice cream scoop would work wonders here, but alas I do not have one, we do not eat much ice cream here, so we never bought one! ) into the palm of your hand and form it into a ball.


So to double coat, first take a ball and roll it in the egg wash, then roll it in the bread crumb mix. Then place the ball BACK in the egg wash and BACK in the bread crumbs a second time. Transfer the coated balls onto the lined baking sheet. Repeat until all the balls are double coated.


After at least two hours, it is time to get the oil ready for frying. In a large saucepan ( or deep fryer if you have one ) add enough oil to cover the balls, 4 inches or so. ( I VERY rarely fry anything, but this recipe will not turn out as well if you bake it in the oven. It turns all mushy and bleh. ) Heat the oil to 375 degrees.
With a slotted spoon, place the balls one by one in the oil. USE THE SPOON as the balls are heavy and will splash if you drop them and if you let go to slowly you will burn the crap out of your fingers. Trust me. I did it, twice, before I USED THE SPOON!
Do NOT overcrowd the pan. Just add three or four at a time. Let them cook until golden brown, turning them every so often so they brown on all sides. I found that when they were pretty much ready, they started to float. Once they are golden, remove them with the slotted spoon and place on a paper towel ( or cloth if you do not use paper goods ) covered tray or plate to drain. Once mine were drained I placed them on a clean paper towel lined baking sheet.


Now, as I said, in the interest of full disclosure...this recipe needed some work. I always make a recipe exactly the first time, no matter where it came from, be it a cookbook, a website, your grandmother, or crazy Aunt Martha, or your next door neighbor's mother's best friend's cousin, and then I add to it later if it needs it or if I want to make changes. These balls were good, but they were not GREAT. When I think of all the Cuban food I have had in the past, from either a restaurant or someone well versed in the culinary culture and has cooked for me, the one thing about all of it was that it was BURSTING with flavor. Your tongue was dancing in your mouth. These balls, as is, did not do that for me. The filling was not very intense, and the barely salted potatoes made it all kind of bland. It tasted more like meatloaf and mashed potato balls. Not bad, but not CUBAN.
I know that liquid can not really be added to the potatoes because they need to be stiff, but it could use some seasonings for sure. More salt, some pepper, maybe add some of the seasonings from the filling to the potatoes as well. Lemon pepper came to mind for some reason when I bit into the potato part. Something to brighten the flavor a bit. My next thought was " This needs some kind of cheese, and some hot peppers for a kick!" I would have to do some research to see what spices, cheeses and peppers would keep in line with the Cuban flavors, but while not Cuban, I was talking the recipe over with a bestie and she recommended cream cheese and jalapenos. Not Cuban as I said, but my mouth watered at the flavor combo. So I can see the potential for the recipe, even if you stray away from the authentic Cuban flavors. You could use the basic recipe and experiment with a lot of great flavor combinations and come up with something totally unique each time you changed something.
So that is my take on this recipe. The prep work seemed daunting at first, because there is that chill time in the middle, but you can make the balls the night before and just pop them in the fridge until you are ready to fry the next day, and that would be fine. Now that I know what I am doing ( as it was the first time I had made them! ) it would not take very long to make these, especially if I did the main part the night before.
There you have it! Have you made or eaten these before, or something similar? Anyone out there have any ideas how to make this recipe POP? If so, drop me a comment, maybe we can create something together that is even better!
Have a great weekend everyone!